
Santa Claus Cutlery Cozy Pattern
It's almost mid December and it doesn't look or feel like Christmas. Outside the weather is mild and a bit more like Vancouver with cloudy days. Indoors, Jason and I decided against putting up a tree this year because we'll be spending the holidays with the in-laws. Basically, our abode does not have a cheery, Christmas vibe going on. Oh! Except for the poinsettia I brought home from work, so at least there's that. Before we leave for Christmas I'd like to have a small pre-Christmas dinner and I thought it might be nice to focus on dinner decor. The idea for this crochet Santa Claus cutlery cozy came after I was browsing Amazon for coloring books (who else likes to color??). I saw these cutlery holders and knew a crochet version needed to happen. And that was pretty much all the motivation I needed to decorate the place.
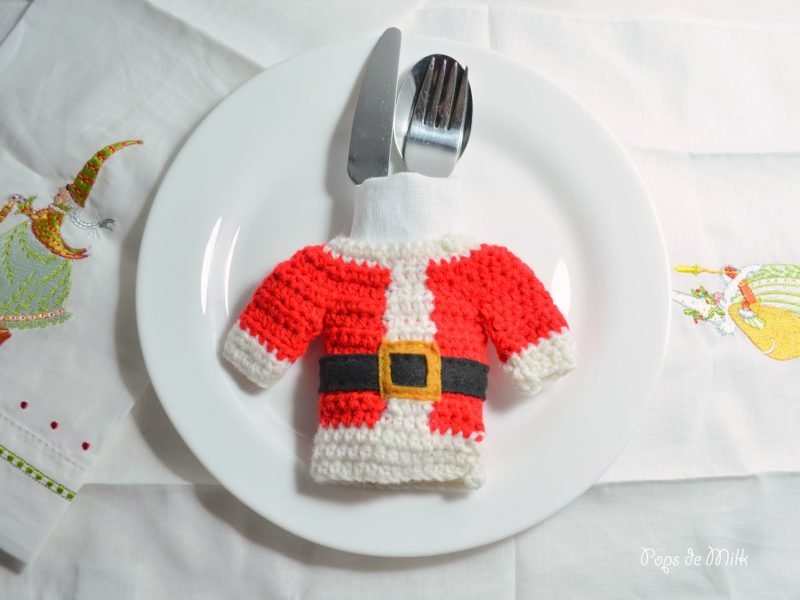
Santa Claus Cutlery Cozy
Materials:
-worsted weight yarn in Red and White
-size 4.00mm crochet hook
-black and gold felt
-needle and black and gold thread
Stitch Guide
Ch –chain
Sc – single crochet
Hdc - half double crochet
Dec – decrease (sc2tog/hdc2tog)
Notes: It’s a good idea to make arms first for easier joining later. Project is worked in rounds. Slip stitch to first stitch, turn at end of each round. Colour changes are made in the last 2 loops of previous stitch. Unless otherwise stated, starting Ch1 does not count as stitch and first stitch is made in same space as slip stitch.
Alternatively you can crochet the torso and sew the arms after instead of joining in Round 10.
Arms
With White
Round 1: ch13, join with sl st to form ring, ch1 (does not count as first st), hdc around, turn (12sts)
Round 2: ch1, hdc around, turn
Switch to Red
Rounds 3-6: repeat Round 2
Fasten off and weave ends OR leave a long tail if sewing to torso.
Torso
With White
Round 1: ch 29, join with sl st to form ring, ch1 (does not count as first st), hdc around (28sts)
Round 2: ch1, hdc around
Switch to Red
Round 3: ch1, hdc in next 5sts Switch to White, hdc in next 4sts, Switch to Red, hdc to end
Rounds 4-9: work even, continuing to make colour changes for White middle stripe.
Round 10: Join first Arm, hdc in next 14sts join second Arm, hdc to end (52sts)
Round 11: ch1, [dec, hdc in next 4sts] x 8, hdc in next 4sts (44sts)
Round 12: ch1, [dec, hdc in next 4sts] x 7, dec (36sts)
Fasten off Red and weave ends. Do not fasten off White.
Neck
Continuing with White in any stitch
Round 1: ch1, [sc in next 4sts, dec] x 6, sl st to first st, do not turn (30sts)
Round 2: ch1, [sc in next 3sts, dec] x 6 sl st to first st (24sts)
Fasten off and weave ends.
Cut a strip of black felt for the belt and sew it along the middle or you can cut a longer strip to go all the way around the holder. Cut out the buckle with gold yarn and sew on top.


Don't forget to share and pin this post for later!
**********
This pattern is for personal use only. The pattern and its photos may not be reproduced, distributed or resold, translated, published, altered, shared or posted in any way over the internet or offline.
You may sell finished items made from this pattern as long as it is handmade by you, not mass produced, giving the credit to Pops de Milk / Patricia Castillo as the designer. If you have any questions, you can email me at patricia@popsdemilk.com
