
Monster Crochet Pencil Case Pattern
It's that time of year when stores are stocked with piles of notebooks, pencils, crayons, and other essential school supplies. When I was a kid it was my favourite shopping season. Cue that Staples commercial and song "It's the most wonderful time of the year" except I'd be the dad, excitedly picking up erasers and smelling them.
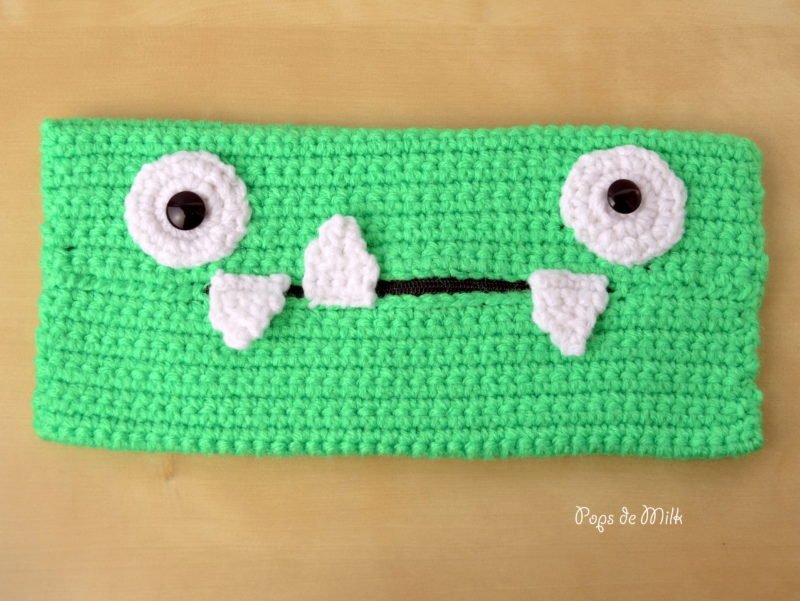
Anyway, I'm sorry to all the kids who are not as excited as I was when it came to stationery. But to those kids who are excited about back-to-school gear, I have a fun and easy crochet project: a monster crochet pencil case. This pencil case was inspired by a furry monster pencil case I saw at a dollar store and I could not wait to get home and make my own monster pencil case!
Monster Crochet Pencil Case Pattern
This project is easy and great for beginners with the only tricky part being the zipper. But aside from that the pattern is a square made up of single crochet stitches, then sewn together to form the monster's mouth. The teeth are 3 crochet triangles sewn above/over the zipper.
Option to add a fabric liner but I feel the stitches are tight enough that one isn't necessary...unless you plan on using it for smaller things besides pencils.
Materials
Worsted weight (4) yarn, such as Red Heart in Glowworm and White
3.50mm crochet hook
2 12" round black buttons
6" zipper though this depends on how big you want the opening to be
Needle and thread to sew zipper and eyes
Yarn needle
Ruler or measuring tape
Case Pattern
With Glowworm
Row 1. ch 42, sc in 2nd ch from hook and each ch across, turn.
Row 2. ch 1, sc in each st across, turn.
Repeat Row 2 until piece measures approx. 8". Fasten off and leave tail for sewing seams.

Teeth
With White
Row 1. Make a slip knot but leave a long tail for sewing later, ch 5 and sc in 2nd ch from hook and each ch across, turn.
Row 2. ch 1, sc across, turn.
Row 3. ch 1, dec twice, turn.
Row 4. ch 1, dec, turn.
Row 5. ch 1, sc.
Cut the yarn and weave in the ends.

Eyes
With White
Round 1. in magic ring ch 1 and make 6 sc, sl st to first st to join, do not turn.
Round 2. inc in same space as sl st and each st around (12sts)
Round 3. [inc, sc in next st] 6 times (18 sts)
Cut the yarn and leave a long tail for sewing.
Assembling the pencil case
Fold and flatten the piece evenly to determine the center.
Tip: Use stitch markers to hold the case in place while you sew.
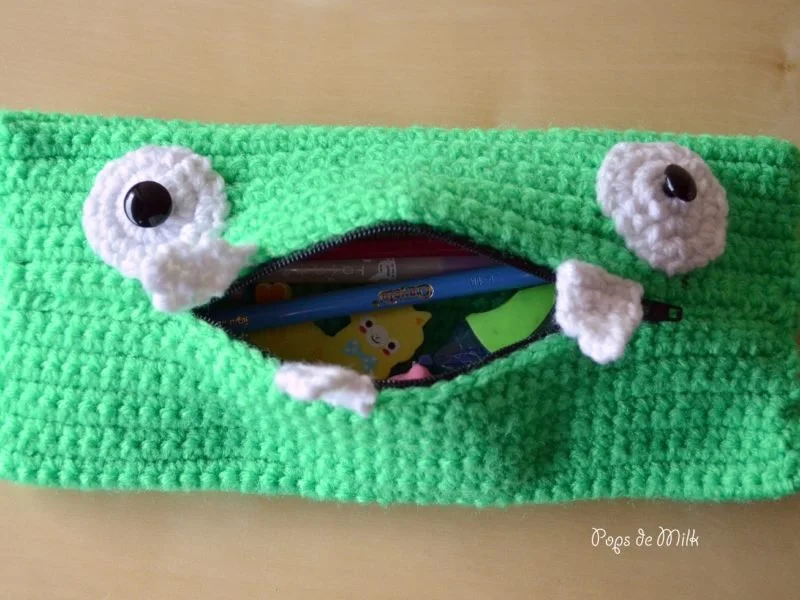
Sew the zipper, centered, first on one end and then the other.
Sew the side seams together, then the mouth seams making sure to neatly go over the ends of the zipper.
Sew the teeth above the zipper.
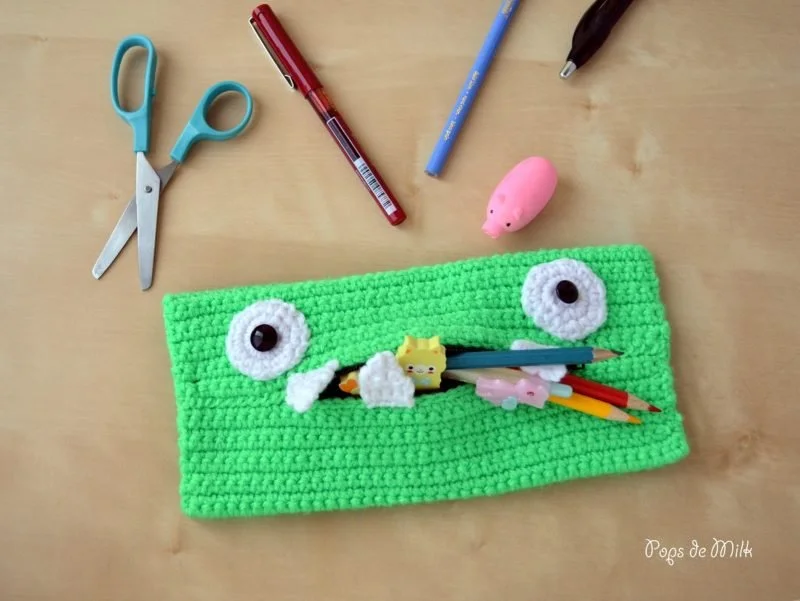
Finish by sewing the eyes and your monster is ready to eat delicious pens and pencils!


You know what else makes a really fun project for kids? Paper mache masks! The Melrose Family has a fun tutorial that shows how to make a paper mache mask or paper mache mask.
**********
This pattern is for personal use only. The pattern and its photos may not be reproduced, distributed or resold, translated, published, altered, shared or posted in any way over the internet or offline.
You may sell finished items made from this pattern as long as it is handmade by you, not mass produced, giving the credit to Pops de Milk / Patricia Castillo as the designer. If you have any questions, you can email me at patricia@popsdemilk.com