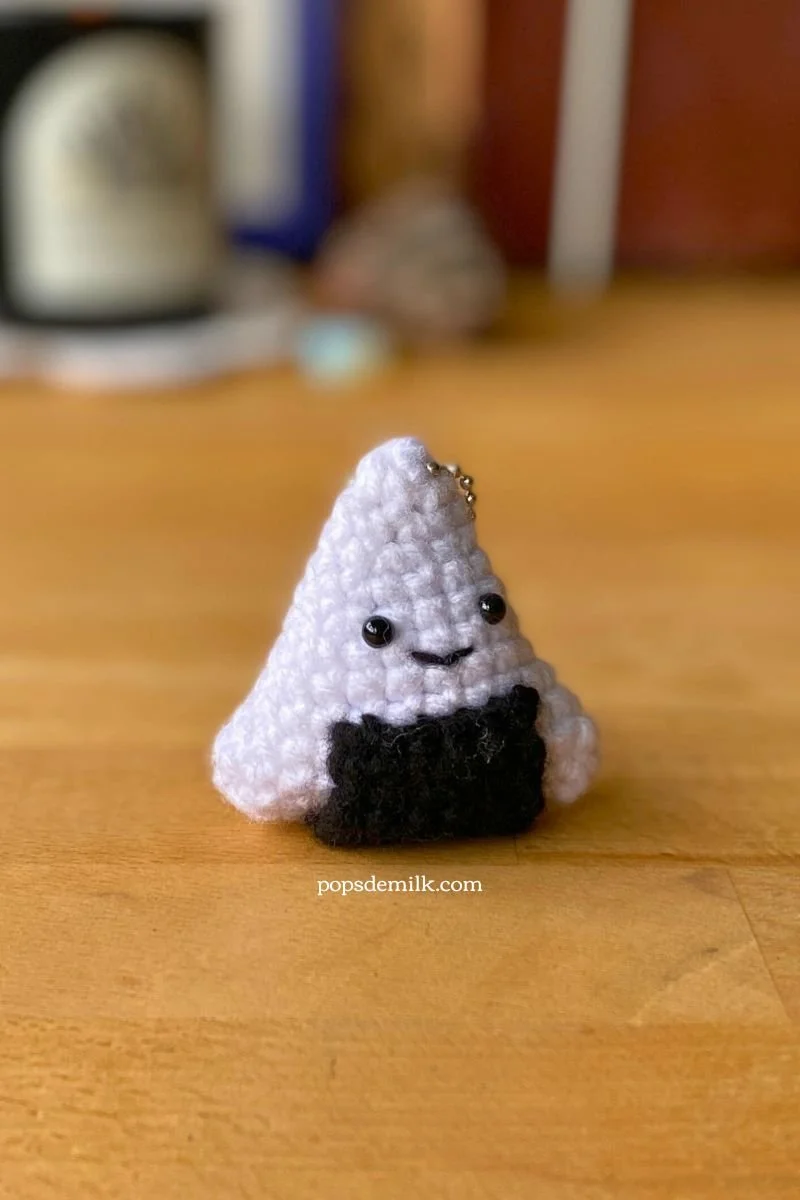
Archive for the 'Dessert' Category

Cream Cheese Pound Cake

Pound cake. When I hear those two words I think of moist, sweet bread with a delicious brown crust. Pound cake takes me back to the days when I’d break off pieces and squeeze them in my hand to make tiny pound cake balls. I’ve often wondered why it’s called pound cake. My first thought is that there’s a pound of butter in it but in this recipe there is only (ha-ha) 3/4 pounds of butter. I did some research and the reason it’s called pound cake is because traditionally there is a pound each of butter, sugar, flour, and eggs.
The pound cake I made comes from, wait for it, Sticky, Chewy, Messy, Gooey: Desserts for the Serious Sweet Tooth.
I used 3 sticks of butter, one package of cream cheese, 2 and a half cups of sugar, 6 large eggs, salt, vanilla, baking powder, and 3 cups of flour. I divided the dough into a loaf pan and a square baking and at 330F it took less than an hour to bake.
I may have beat the dough a bit too much, causing it to turn a little airy. I also didn’t use eggs at room temperature and the coldness from the eggs made the butter (also at room temperature) temporarily curdle. No worries though because the cake is fantastically moist and perfectly sweet. It’s a brilliant choice for breakfast with a cup of coffee.

Heart of Darkness Brownies

Some days you just feel like your body can’t continue to hold and support all the day’s worries, late lunches, mistakes, and over-all fatigue. All you really want to do after work is curl up on the couch and watch re-runs of Family Guy.
A few days ago at work, I volunteered to bake brownies for a co-worker’s birthday and it was the night before his birthday and I felt the way I just described above. I wanted to hop in my pjs and veg out in front of the TV but instead I pulled out all the necessary ingredients to make Heart of Darkness Brownies from  Sticky, Chewy, Messy, Gooey: Desserts for the Serious Sweet Tooth. All the recipes I’ve tried from this book are incredibly amazing and so I trust this book so much that I made these brownies for my co-workers despite the fact I’d never made them before. I had no idea if the brownies would turn out but I had (and have) faith in the book.
Upon reluctantly rolling up my sleeves and unwrapping the block of butter the knowledge that I would soon bake something somehow lifted my spirits and I felt more peppy. I felt even happier seeing that these brownies were nothing more than a cup and a half of butter, 6 squares of unsweetened chocolate, 6 eggs, 1 cup of sugar, 1 cup of brown sugar, chocolate bars, chocolate chips, nuts, and of course flour, and salt. In the book it says to use muffin tins but as I mentioned already I was feeling lazy so I split the batter and poured it into two square pans. That meant, of course, that I had to bake them longer for 30 minutes or so.
My goodness, these brownies could have mended any broken heart (as Jill says in the book) or in my case, scared away all the lethargy taking refuge in my body. They were thick and disgustingly rich in the middle with a firm layer on top. Each bite was slightly different because you didn’t know if you’d get a chunk of pecan or a piece from a Snickers bar. To make it even more messy to eat, I topped the brownies with multi-coloured mini marshmallows, which perfectly puffed and melted in the oven giving the brownies a nice fruity goo on top.
I’ll be making these brownies again but next time, I’ll listen to Jill and use muffin cups because cutting melted, chewy marshmallow and gooey brownie is a bitch.
Recipe can be found here.

Lemon Squares

Several weeks ago, after embarking on the ludicrous writing adventure, I found myself stuck. Writer’s block. So what did I do? I baked. I procrastinate by baking. And thanks to the lovely AsiaJo over at Frock and Fork, I found exactly what I needed to make on that day of mental stuckness. Lemon Squares (recipe here). Let them cool completely as they are quite soft when they come out of the oven. These easy to make squares were so delicious and perfectly sweet. Addictive too. I had to hide them so I wouldn’t eat them all in one sitting.

Halloween

Alright, so this post is kinda late but, better late than never, right? This year, Jay and I had a very quiet Halloween with three friends, a couple of scary movies, really “gross” food, and a last minute pumpkin carving contest. It seems like tradition now for me to make Vampire Cupcakes especially because I think this is the third time I’ve made them. My friend sent me the link to Baking Bites a while back and I instantly fell in love with the cupcake recipe (found here). Trust me, they are worth the effort. Only thing is, when you’re making the marshmallow frosting, don’t over beat the eggs or the frosting will over time get hard and crunchy. Not a big deal and our friends insisted it added to the cupcake experience but I personally prefer to have my frosting soft.

001 (17)

And now comes the “gross” food…

Gnarled and mangled shortbread fingers with sliced almonds for nails. A couple of the fingers lost their “nails” and I glued them back on with leftover “blood” (cherry filling).

010 (9)

BBQ “Bat” wings (recipe here). Sweet and yummy.

011 (5)

My personal favourite, gutted flesh worms (instructions here). Honestly, this was delicious.

033 (3)

Jay had originally allotted 45 minutes to carve our pumpkins but that was just impossible. I think it took us close to two hours to carve these beauties:

040

Lumpy Cookies

I’ve been in a cookie-making mood the last two weeks – probably because they’re easy to make and I love using my Huckle Cat cookie jar.
Inspired by the Everything But The Kitchen Sink Cookies from Sticky, Chewy, Messy, Gooey: Desserts for the Serious Sweet Tooth, I decided to make my own variation of these fabulous cookies:

Makes about 30 cookies
1 cup all purpose flour
1 cup rolled oats
1 cup butter, softened
3/4 cup brown sugar
1 tsp vanilla
1 egg
1 tsp baking soda
Dash of salt
1/2 cup raisins
1/2 cup walnut pieces
1/2 cup semi-sweet chocolate chips

Preheat oven to 325F. Beat together the sugar and butter until creamy. Add the egg and vanilla and mix well. Add the flour, rolled oats, baking soda, and salt until combined. Add the raisins, walnut pieces, and chocolate chips. Use a tablespoon to scoop out the dough, roll slightly with your hands and place on a lined cookie sheet, spaced well apart. Press each mound down slightly with your fingers but don’t flatten too much. Bake for about 12-15 minutes. Let them cool completely. The cookies turned out sweet and chewy.

017 (6)

Chocolate Hazelnut Cookies

To me, dipping a tablespoon into a jar of Nutella and licking the gooey, chocolately, hazelnutty spread is absolute heaven. Don’t judge. I know there are others like me. Tons.

It’s with this love of Nutella that I eagerly baked a batch of chocolate hazelnut cookies, filled with none other than Nutella. God I love that stuff.

This is another recipe from 1 Dough, 100 Cookies by Linda Doeser.

Makes about 30 cookies

1 cup butter, room temperature

3/4 cup sugar

1 egg yolk

2 tsp vanilla extract

2 cups all purpose flour

1/2 cup unsweetened cocoa powder

1/2 cup ground hazelnuts

1/3 cup semi-sweet chocolate chips

4 tbsp chocolate hazelnut spread (Nutella)

salt

Preheat oven to 375F. Mix butter and sugar until creamy and smooth. Beat in the egg and vanilla. Sift into the mixture the flour, cocoa powder and a pinch of salt. Add the hazelnuts and chocolate chips. At this point you will probably have to knead the dough with your hands. Don’t worry if it looks too dry and hard, it’ll turn into cookie dough texture once it’s kneaded. Use a tablespoon to scoop the dough and roll into balls with your hands. Use the handle of a wooden spoon to make a hollow in the centre of each cookie. Bake for 12-15 minutes. Let the cookies cool completely before filling them with Nutella. I snipped off a corner from a plastic sandwich bag to “pipe” the Nutella into the cookies.

031 (3)

Timpano!

Last night, a friend celebrated his 30th birthday and, like most foodies, he wanted to make dinner. He chose to make timpano, something he and his fiancée saw in a movie called The Big Night. It’s basically a sort of pizza dough stuffed with pasta, sauce, sausage, meat, hard boiled eggs, cheese, and I don’t know what else. Let me just say that this was fantastic and I have to make this dish at some point in the future. It’s baked inside a domed shaped vessel similar to a mixing bowl, like this:

008 (10)

Once it’s baked, you flip it over and it looks like this:

012 (5)

021 (5)

Served in slices that make you smile and rub your belly in appreciation:

025 (2)

With dinner, we ate fresh baked bread that Jay made that afternoon. It comes from a Rose Levy Beranbaum recipe (found here) and it is amazing. The bread is so nice and thick, rich, and full of yum.

016 (7)

For the birthday boy, I made the Perfect Party Cake. This time, however, I’ve used the recipe as detailed in Dorie Greenspan’s book. Personally, I preferred the original Dorie version (which can be found here on tablefare’s blog) much more than the one I made for my birthday.

Covered in shredded coconut.

Covered in shredded coconut.

030 (3)

Chocolate Chip and Cinnamon Cookies

Not too long ago I acquired yet another baking book. It’s called 1 dough, 100 cookies by Linda Doeser. I hadn’t baked any of the cookies in the book until today because I couldn’t make up my mind on which recipe to try. I figured chocolate chip cookies with cinnamon would be a safe and easy way to start. I’ve adapted the recipe slightly:

Makes about 30-34 cookies

1 cup butter, softened

1/2 cup golden yellow sugar

1/4 cup sugar

1 egg yolk

2 tsp vanilla extract

2 1/2 cups all purpose flour

1/2 semi sweet chocolate chips

salt

For the coating:

1 tbsp sugar

1 tbsp ground cinnamon

Preheat oven to 375F. Mix the butter and sugar together until creamy, then beat in the egg yolk and vanilla. Sift together the flour and a pinch of salt into the mixture. Add the chocolate chips and combine. At this point I stared, confused, at the dry and crumbly “dough” in my bowl. It looked more like pie pastry before it’s kneaded together, which is what I decided to do. I had to knead the dough with my hands until it had the consistency of cookie dough. Once that’s ready, scoop out tablespoons of dough and roll into balls. For the coating, mix the cinnamon and sugar in a shallow bowl and roll the cookie dough balls around to coat. Place on a cookie sheet lined with parchment paper and flatten each ball slightly. The book says to bake for 12-15 minutes but I’d say bake 15-20 minutes, depending on how crappy or awesome your oven is. In my case I took them out after 20 minutes because they never changed their shape, I thought the butter would melt and they’d transform into flatter cookies. Instead they kept their original shape.

The first cookie I tried was kind of a let down. I was expecting a hard and crunchy cookie but it was just crumbly and the flavour seemed a little weird, like old oil. The next cookie I ate was a thousand times better, crumbly, sweet and full of cinnamon. So I’m thinking that maybe the first cookie touched a part of the Silpat sheet with oil residue? I’m not sure. Anyway, these things are a little addictive and I’ve eaten about 10 of them now, so be careful.

Cookies with a glass of almond milk.

Cookies with a glass of almond milk.

Apple Pie

Procrastination takes the form of the desire to bake. In my case, I baked an apple pie yesterday using the recipe found on the Joy of Baking website, which I believe is from a Rose Levy Beranbaum book. Thus far, every recipe I’ve made from the Joy of Baking website and the few recipes from Ms. Rose have been amazing. Easy to follow and delicious to eat. Except I made one little mistake last night.

I started out by slicing all the apples and then putting them in a bowl to macerate for two hours. I made the dough and that was no problem though I was almost sweating from nerves. You see, I haven’t made an apple pie in the longest time because the last couple of times I made a pie the baked crust turned out sandy and mushy. I found out that happened because the crust wasn’t chilled or something like that. Anyway, I made sure to follow the instructions very carefully for the dough. Once the apples were macerated I began the process of collecting the juices from the apple mixture. I collected exactly half a cup as the recipe says. I thought, “Woo! This is a piece of cake, er, pie!” I put the juices to boil with butter on the stove, enjoying the wonderful aroma as they bubbled. While that was happening, it came time to roll out the dough so I did that and I became so absorbed in my task that I didn’t notice the syrup had already finished cooking. It wasn’t until I started to smell a very noxious odour that I jumped into the kitchen to remove the pot from the stove, which now held a very black liquid. Needless to say, I didn’t pour the liquid into the apple mix. How could I? It looked like burned oil! So, if you’re going to make this pie, please be sure to keep an eye on boiling liquids.

Despite the fact that I didn’t include the syrupy liquid, the pie turned out so delicious. The instructions say to wait 3 or 4 hours before cutting it. I waited about two and a half hours because Jay and I couldn’t resist anymore. The crust was so nice and crumbly and the apples were tender, not mushy. I think the pie was a tad too tart but Jay didn’t think so. Next time I’ll be sure to include the apple syrup.

005 (11)

009 (10)

The weekend of gorging

Well, I’m almost positive I gained at least 15 pounds this weekend. I’ve eaten so much I’m kinda sick of looking at food…well, not really haha. Unfortunately, because I ate so much, and drank so much too, my brain is a little groggy so I will only copy the recipes and post pictures of what I made on Saturday and Sunday. I’ll only say this about the food: orgasmic.

Delicious rice and chicken for pre-clubbing dinner on Saturday

Delicious rice and chicken bake for pre-clubbing dinner on Saturday

Rice and chicken bake with salad.

Rice and chicken bake with salad.

Birthday cake made for our friend Dee on Saturday.

Birthday cake made for our friend Dev on Saturday.

Birthday cake - I am amazed I was able to make so many layers!

Birthday cake - I am amazed I was able to make so many layers!

The Delicious Rice and Chicken bake recipe comes from the inner workings of my mother’s mind. Well, the idea comes from her creation that she made when she was in her 20′s. I’ve made a variation of her original recipe, which includes ketchup, ham as well as chicken, mozzarella or cheddar cheese only, and sour cream instead of yogurt.

My version of Delicious Rice and Chicken bake (or arroz rico, as my mother would say):

6 cups cooked rice

2 chicken legs, cooked and shredded

1/4 red bell pepper

10 kalamata olives, chopped

1/2 onion, chopped

1 tomato, sliced

Approx 1/2 cup yogurt

3 or 4 oz feta cheese

3 o 4 oz cheddar cheese

Approx 1/2 tsp oregano

1/4 tsp dried mint

Preheat oven to 350F. Grease a fairly deep baking pan, maybe 9×11. Mix the chicken with the onions, red bell pepper, onion, and olives. Season with the mint and a little more than half of the oregano portion, reserve some oregano to sprinkle on top. Next, make even layers starting with yogurt at the bottom of the pan followed by rice, chicken, tomato slices, cheeses, and repeating until all ingredients have been used up, ending with rice. You can mix up the order of the layers but it’s a good idea to start with yogurt at the bottom so that the rice won’t stick. Finish with a rice layer on top, sprinkle more cheese and oregano and other spices if you want. Cover with foil and bake for 20 minutes. Remove foil and bake another 15 mins or until cheese looks gooey and melty. Yum.

For the cake, I don’t remember where I found the recipe but it was in one of my recipe folders for a long time and I figured it was time to test it out. The cake was so moist and rich and yummy.

Yellow Butter Cake with Filling and Frosting

4 large eggs, room temperature
1/2 cup whole milk, room temperature
2 tsp vanilla extract
1 3/4 cup plain cake flour, sifted after measured
1 1/2 cups sugar
2 tsp baking powder
3/4 tsp salt
2 sticks butter, softened but still cool

Preheat oven to 350 degrees. Generously grease two 9 inch round cake pans and cover the pan bottoms with rounds of parchment paper or waxed paper. Grease the parchment rounds and dust with flour, tapping out excess. May also bake in a greased and floured 13×9 inch pan.
Beat the eggs, milk and vanilla with a fork in a small bowl. Measure out 1 cup of this mixture and set aside.
Combine the flour, sugar, baking powder and salt in a large bowl. Stir to blend. Using a fork, cut the butter into the dry mixture, one Tbsp at a time. The butter and flour will begin to clump together and look like small peas. When all butter is combined with the flour, use a mixer to beat the butter and flour for about 30 to 40 seconds. On a low speed, add the 1 cup of the egg mixture that was set aside and beat until incorporated (5-10 seconds). Increase speed to medium-high and beat until light and fluffy, about 1 minute. Add remaining egg mixture in a slow, steady stream, taking about 30 seconds. Scrape the sides and bottom of the bowl. Beat for another 15 seconds until thoroughly combined and the batter looks slightly curdled.
Divide batter equally between the prepared cake pans. Spread to the sides and smooth. Bake at 350 degrees until cake is a light golden color and a toothpick inserted in the center comes out clean. Bake round layers approximately 20 to 25 minutes and 13×9 inch pan 30 to 38 minutes.

Fill with cooked condensed milk (dulce de leche) using these instructions from David Lebovitz.

Frost with chocolate buttercream

2 2/3 c. sifted confectioners’ sugar
1/4 c. cocoa powder
1/4 tsp. salt
1 egg
1/4 c. (1/2 stick) butter, softened
3 tbsp. hot water

Sift confectioners’ sugar, cocoa powder and salt into medium-sized bowl. Add egg, softened butter and hot water. Blend with spoon, then beat with rotary beater or electric beater until smooth. This frosts 1 (8 inch) triple-layer cake.

Now on to Thanksgiving!

Butternut squash soup.

Butternut squash soup.

Fall off the bone turkey, tofu and spinach stuffed shells, corn, The Stuffing, and super creamy mashed potatoes.

Fall off the bone turkey, tofu and spinach stuffed shells, corn, The Stuffing, and super creamy mashed potatoes made by my little sister, Sue.

Pumpkin pie with whipped cream.

Pumpkin pie with whipped cream.

Pumpkin Cheesecake with yogurt topping.

Pumpkin Cheesecake with yogurt topping.

I want to thank my lovely friend, Nervous Chef, for the butternut squash soup recipe, which she raved about and told me I simply had to make it. She was so right. The recipe can be found here from epicurious.

The stuffing turned out amazingly good and the recipe can be found in my previous post.

Prepping the turkey is one of the messiest jobs to do. You definitely need someone to be around to help you wash up every 2 minutes, like your devoted and helpful boyfriend. Thanks Jay!!

For my family’s version of turkey you’ll need the following:

Butter

About 2 cloves garlic, cut into small pieces/slivers

A few cloves

Mustard

1-2 bottles of beer

About 4 or 5 banana leaves, cut roughly into 9×11 inch sized pieces

So, first you start by washing the turkey, inside and out and make sure you remove the bag of giblets and the neck. Next, poke small holes/slits all over the turkey and fill the slits with slivers of garlic and cloves. Once that’s done, rub butter all over the bird, especially around the wing tips. Next, rub mustard over the butter, stuff the turkey with stuffing and place, breast side up, in a roasting pan. Pour a bottle of beer over the turkey and pray that the beer doesn’t wash the mustard off. Sprinkle salt and pepper and then cover the turkey with moistened banana leaves (these add moisture and flavour). Cover and bake at 325F for approx 4 hours (for a 12-14 pound bird). Turn the turkey over every hour and baste with juices, making sure to cover it back up with the banana leaves. After about 2 hours, add the remaining bottle of beer or whenever you think the liquids are drying up. Uncover the turkey and let it brown for about 30 minutes. Let the turkey stand about 15 minutes before carving.

For my dad, the vegetarian, I made stuffed shells from a recipe I found on Post Punk Kitchen. Recipe here.

The corn was probably the easiest thing to make. Fill a pot with water and salt, add the corn and cook on medium heat for about a half hour. Done.

The amazing pumpkin pie and pumpkin cheesecake recipes can be found here and here. The only change I made was the pie shell for the pumpkin pie was store bought and the topping on the cheesecake was yogurt. I have no leftovers of pie or cheesecake – it’s all gone and I’m very sad.

Now that the weekend of cooking is over I feel a sense of accomplishment and a little sadness because it’s over. The sadness is quickly replaced by an eagerness to host a dinner very soon!

Next Page »