
How to Crochet the Grit Stitch Variation + Video Tutorial
Are you ready to add a touch of texture and charm to your crochet repertoire? Well, let me introduce you to a variation of the grit stitch. With its simple yet mesmerizing pattern, this variation of the grit stitch is perfect for beginners and seasoned crocheters alike.

What is the Grit Stitch?
The grit stitch, similar to the linen stitch or moss stitch, creates a dense and textured fabric. The standard grit stitch is made up of skipping a stitch and working two single crochets. In this variation instead two single crochet it’s a single crochet and double crochet stitch, giving it a bumpy appearance that’s sturdy and versatile.
What can you make with the Grit Stitch?
Depending on the type of yarn, hook size, and tension, you could make a wide variety of items. Off the top of my head here are just a few items:
Home Decor Ideas
Dishcloths / Wash cloths
Coasters / Mug rugs
Place mats
Table runner
Blankets
Accessories
Scarves
Shawls
Headbands
Bags
Laptop or tablet sleeves
Garments
Vests
Sweaters
Tank tops
Skirts
I could probably keep thinking of ideas but I think you get the picture. So let’s get started and make a stitch sample!
Materials
Worsted weight yarn of your choice, I’m using a mystery yarn from my scrap yarn bin and I’m going to guess it’s a bulky weight yarn
A crochet hook in an appropriate size for your yarn, I’m using a 4.5mm hook
Yarn needle for weaving in ends
Abbreviations (US terminology)
ch - chain
sc - single crochet
dc - double crochet
sk - skip
Step-by-Step Guide to Crocheting the Grit Stitch Variation
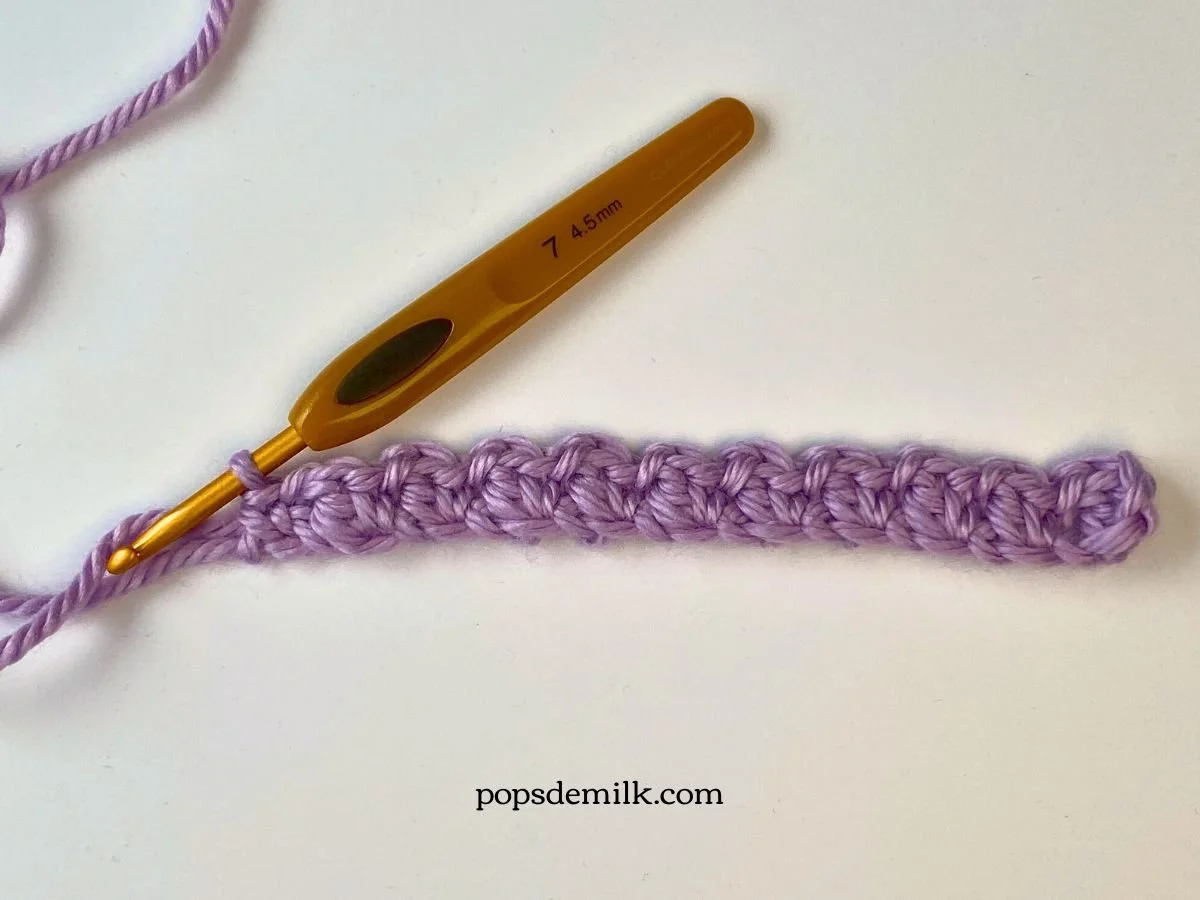
Start with a foundation chain. Begin by chaining until you reach your desired length. Note: The grit stitch is worked in multiples of 2 plus 1 and an additional 2 chains for the foundation chain. In this sample I’m starting with a foundation chain of 23.
Row 1: dc into the 3rd ch from your hook (the 2 chains you skip count as your first sc), * ch 1, sk 1 ch, in the next ch make (1 sc, 1 dc) in the same chain, repeat from * until there are 2 chains left, ch1, sk 1 ch, sc into the last chain, turn your work to start the next row.
Row 2: ch 1 (this counts as your first single crochet), dc into the first stitch (right next to the chain 1), * sk the next dc, in the next sc make (1 sc, 1 dc) in the same st, repeat from * until you reach the last two stitches, sk 1 st, sc into the turning chain from the previous row, turn.
Repeat Row 2 for as many rows as desired, always chaining 1 and turning your work at the end of each row.


Tips and Tricks for Crocheting the Grit Stitch
Be mindful of your tension as you crochet. Try not to pull too tightly or too loosely, as this can affect the overall look of your stitches.
While the grit stitch is relatively simple, it's easy to lose track of your stitches, especially when you're just starting out. Take your time and count your stitches now and then to make sure you have the right number of stitches. Eventually you’ll find a rhythm and discover how relaxing and meditative this stitch can be!
The beauty of the grit stitch is how versatile it can be. Experiment with different yarn weights and hook sizes to get different textures and densities.
One of the great things about the grit stitch is that it looks beautiful on both sides of the fabric, making it perfect for scarves, blankets, and other reversible projects.
What I love about it is the repetitive nature making it an excellent choice for practicing mindfulness and relaxation. I love listening to an audiobook and letting the rhythm of the stitch soothe my soul.
I hope this how-to guide has been helpful and inspiring. Be sure to follow me on social media for more tips, tutorials and news, just check out the links at the top of this page!
Looking for more crochet stitch tutorials? Check these out:
How To Crochet the Trellis Stitch
How to Crochet the Zigzag Stitch
How to Crochet the Long Wave Stitch
How to Crochet the Moss Stitch
How to Crochet the Shell Stitch
**********
This tutorial is for personal use only. The photos may not be reproduced, distributed or resold, translated, published, altered, shared or posted in any way over the internet or offline.
You may sell finished items made from patterns designed by me as long as it is handmade by you, not mass produced, giving the credit to Pops de Milk / Patricia Castillo as the designer. If you have any questions, you can email me at patricia@popsdemilk.com