
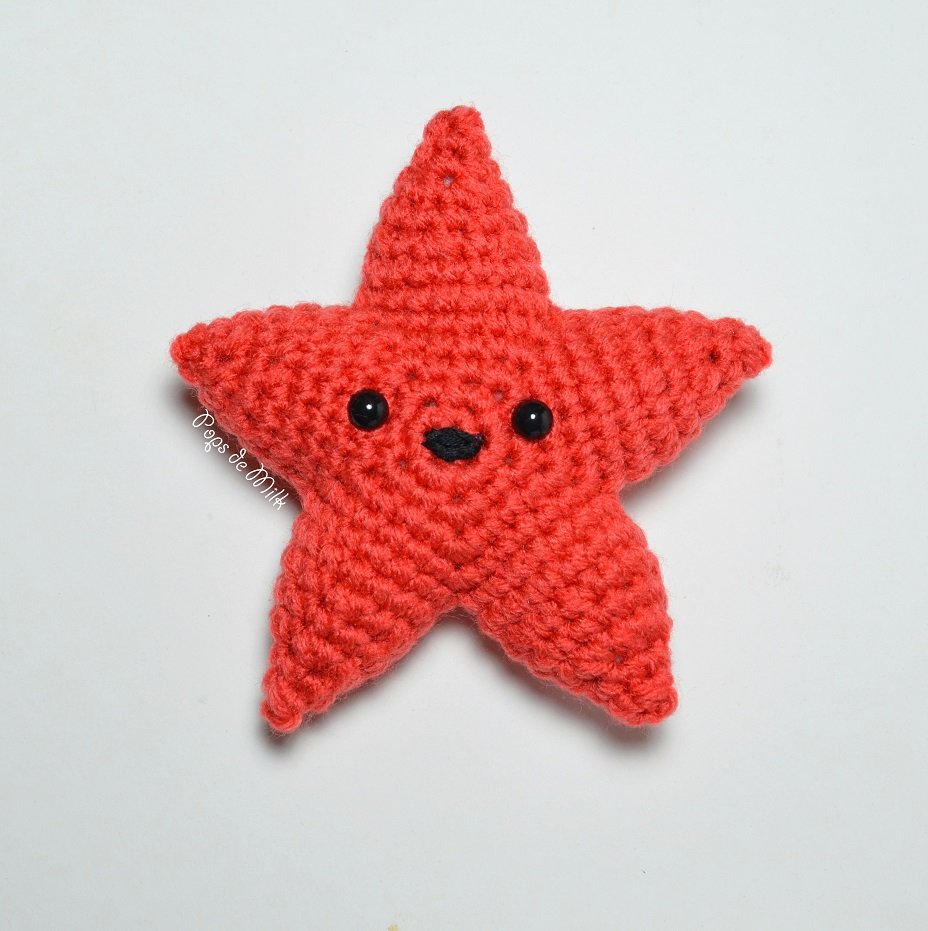
Crochet Starfish Pattern
First I want to express how happy it makes me to know you're all out there making lovely things with my crochet patterns. I can't tell you enough how giddy I get when you send me photos or tag me on Instagram other socials :) Secondly, I super duper appreciate those of you who have brought up questions, typos, and errors in my patterns. It helps so much! As an appreciation I wanted to tackle one pattern that has been causing a bit of confusion. The starfish amigurumi. I made this starfish when I was still learning how to design my own patterns and I felt so accomplished. This was one of those patterns that required quite a bit of creativity in order to minimize the amount of sewing.
Keep scrolling for the free pattern or you can purchase the ad-free and inexpensive PDF version of the pattern in my shop and on Etsy.
Years later, reading over the instructions I can see how they may not be clear. I can also see that the original photo shows longer limbs than what the pattern produces. How did that happen? Sadly, I'm not able to consult the original starfish because it went on to a forever home. But now, armed with a bit more knowledge and experience, I give you a revised starfish pattern and photos!
Crochet Starfish Amigurumi Pattern
Finished size is approx. 5 inches.
Materials:
Worsted weight yarn
4.00 mm hook
Tapestry needle
Embroidery thread and needle
Optional: safety eyes
Fibrefill for stuffing
Stitches used (US terms)
ch – chain
sc – single crochet
inc – increase (2 sts in same stitch)
inc3 – 3 sts in same stitch
dec - decrease (sc 2 tog)
Pattern Notes: Start by making 2 pentagons as explained below, fasten off the first but do not fasten off the second pentagon. When starting the arms make the first round of stitches along the newly made chains, then the next stitch is made in the same space as the start of the chain and finally the last stitch is made in the same space where the chains were slip stitched to. This creates a total of 18 stitches to work in continuous rounds. Repeat the same steps for the remaining arms.
The points of the pentagon are created by making inc3 in the center stitch of each inc3. Observe my wonderful drawing! 😂

First Pentagon
Round 1: Start 5 sc in ring.
Round 2: inc in each st (10 sts)
Round 3: [inc3, sc in next st] x 5 (20 sts)
Round 4: sc, [inc3, sc in next 3 sts] x 5, sc in next 2 sts (30 sts)
Round 5: sc in next 2 sts, [inc3, sc in next 5 sts] x 5, sc in next 3 sts (40 sts)
Fasten off and weave ends.

Second Pentagon
Repeat Rounds 1-5 of first pentagon but do not fasten off. You will begin to crochet the arms as follows:
Round 6: sc until you reach a point (a space with 3 sc), ch 9 in the 2nd of 3 sts, sl st in next point (2nd of 3 sts in next set of 3 sc), turn and sc around (18 sts)
Round 7: sc in each st (18 sts)
Round 8: [sc in next st, dec] x 6 (12 sts)
Round 9: sc in each st (12 sts)
Round 10: dec in each st (6 sts)
Round 11: sc in each st (6 sts)
Continue to dec until closed. Fasten off and weave in ends.

To continue making the rest of the arms, pick up a stitch in the next point of the pentagon and repeat the process. Stuff the arms with fibrefill and embroider the face/add safety eyes to the pentagon. Take the fastened off pentagon, align it with the back and sew to body, stuffing with fiberfill as you go along.


If you make this crochet starfish pattern I'd love to see you creation, just tag me on Instagram @popsdemilk_crochet and use the hashtag #popsdemilk
Looking for more crochet ocean creatures? Then you might like these:
Sperm Whale Amigurumi Crochet Pattern
Dolphin Amigurumi Crochet Pattern
Don't forget to share and pin this post for later!
**********
This pattern is for personal use only. The pattern and its photos may not be reproduced, distributed or resold, translated, published, altered, shared or posted in any way over the internet or offline.
You may sell finished items made from this pattern as long as it is handmade by you, not mass produced, giving the credit to Pops de Milk / Patricia Castillo as the designer. If you have any questions, you can email me at patricia@popsdemilk.com