
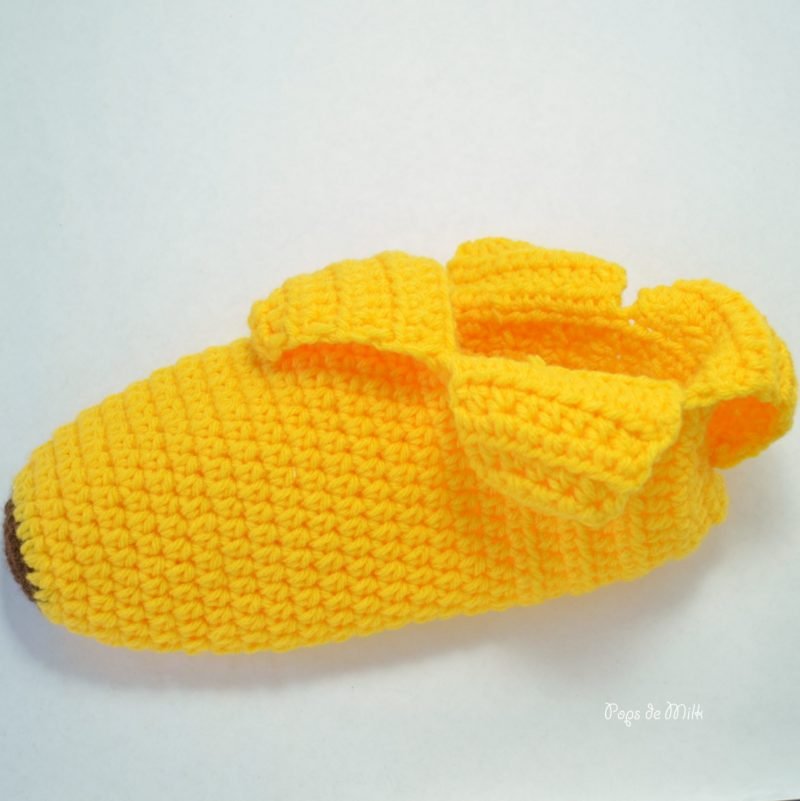
Banana Peel Slippers Crochet Pattern
Yes, you read the title correctly. Banana. Slippers.
A few months back I designed baby booties for the book Creature Feeturesand I remember thinking, as I gazed lovingly at the adorable slippers I had made, "I really wish these came in my size." Once the thought was in my head I knew I wouldn't be able to ignore it. I drew inspiration from the banana booties I submitted to the publisher and used my chunky sock slipperspattern to get me started. And of course, I used my amigurumi skills to help me with the design - this is basically what I used to make the baby booties too since it was my first time making garments! Banana Peel Slippers Crochet Pattern:

You can purchase the ad-free and inexpensive PDF version in my shop and on Etsy.
Banana Peel Slippers Crochet Pattern
To make the slippers I used worsted weight acrylic yarn and kept a medium tension - this isn't amigurumi but it's not a loose stitch either. I wanted there to be flexibility in the fabric while making it durable and of course, cozy.
Materials
-approx. 100 grams worsted weight yarn in yellow
-small amount of worsted weight yarn in dark brown
-size 4.50mm crochet hook
-yarn needle
Stitches (US terms)
ch - chain
sl st - slip stitch
sc - single crochet
hdc - half double crochet
inc - increase (2 sts in same st)
dec - decrease (ie. hdc2tog)
Notes - *Be sure to read before starting*
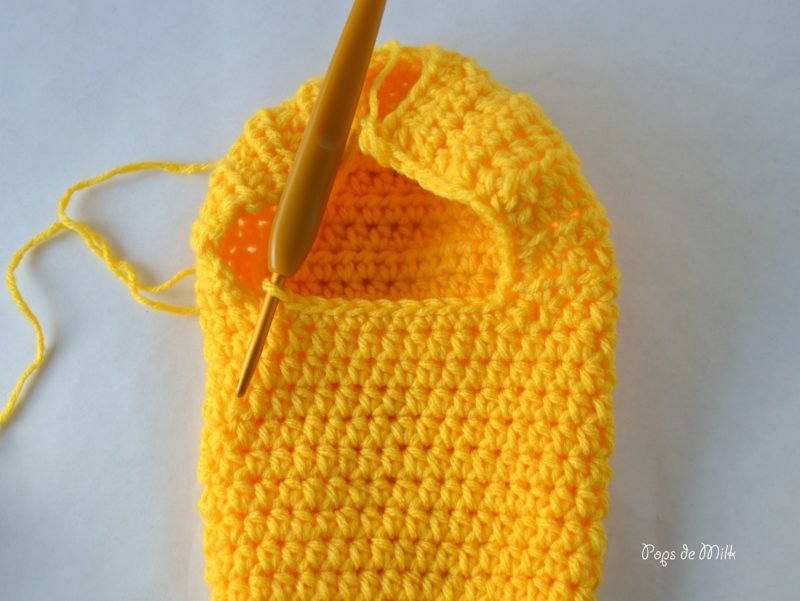
First part of pattern is worked in rounds, starting with the toe. Slip stitch to first stitch at the end of each round and do not turn. Starting chain does not count as stitch, make first stitch in same space as slip stitch, as shown in photo below. Use stitch marker to keep track of rounds. Instructions in brackets [ ] are completed by the number of times indicated. Heel and peel segments are worked in rows - do not join at end of row, turn. Ankle is worked in rounds same as the toe/foot part.

Banana Slippers
Sizing
Finished size is for women’s 8-9US but the length can be adjusted by adding/removing “work even” rounds and the width can be adjusted by increasing or not increasing in the first 10 Rounds.
Pattern - Toe
Starting with Dark Brown yarn
Round 1: in magic ring, ch 1 and make 6sc
Round 2: ch1, inc in each st (12 sts)
Round 3: ch1, [inc, sc in next st] x 6 (18 sts)
Switch to Yellow. The remainder of the pattern is worked in hdc.
Round 4: ch1, [inc, hdc in next 2sts] x6 (24 sts)

Round 5: work even
Round 6: ch1, [inc, hdc in next 3sts] x6 (30 sts)
Rounds 7-9: work even

Round 10: ch1, [inc, hdc in next 4sts] x6 (36 sts)
Rounds 11-19: work even

At this point you can measure the sock and see if it fits and adjust if necessary. The sock should come to just before the heel.
Heel
Row 20: ch1, hdc in next 26sts, leave remaining stitches, turn.
In the following rows note that the last stitch is worked into the starting chain that makes up the first stitch of previous row.
Row 21-27: ch1, hdc across, turn (26 sts)
Row 28: ch1, [hdc in next 2sts, dec] complete twice, hdc in next 4sts, dec, hdc in next 4sts, dec, hdc in next 2sts, dec, hdc in next 2sts, turn (21 sts)
Row 29: ch1, hdc in next 3sts, [dec, hdc in next 4sts] x3, turn (18 sts)
Row 30: work even, join with sl st to first st

Ankle - Worked in rounds
Round 31: ch1, evenly make 15hdc in row sides, sc in next 10hdc (the unworked sts from Round 19), evenly make 15hdc in remaining row sides, sl st to join (40 sts)
Fasten off and leave a tail long enough to sew the seam shut. *Optional: if you’d prefer a higher ankle you can add more rounds before fastening off.


Peel Segments
Each peel segment has a base of 10 sts, decreasing in indicated rows to taper to points. It might be helpful to place stitch markers every 10 stitches, as shown.

Row 1: With toe pointing down and facing top/opening, pick up hdc in right corner sc st from Ankle Round, hdc in next 9 sts, turn
Rows 2-3: ch1, hdc across, turn
Row 4: ch1, hdc in first st, dec, hdc across to last 3sts, dec, hdc in last st, turn
Row 5: ch1, hdc across, turn
Repeat last 2 rows until 2sts remain. Fasten off leaving tail to sew to top/sides of slipper.
Repeat for remaining segments.


If you make these crochet banana slippers I'd love to see your creation, just tag me on Instagram @popsdemilk_crochet and use the hashtag #popsdemilk
Looking for more crochet slippers? Then you might like these:
**********
This pattern is for personal use only. The pattern and its photos may not be reproduced, distributed or resold, translated, published, altered, shared or posted in any way over the internet or offline.
You may sell finished items made from this pattern as long as it is handmade by you, not mass produced, giving the credit to Pops de Milk / Patricia Castillo as the designer. If you have any questions, you can email me at patricia@popsdemilk.com