
Crochet Christmas Tree With Buttons!
At work last week I noticed someone had put up a Christmas garland on their cubicle wall. It was Monday morning and I had just walked into the office so the sight of cheery holiday decor made me smile. It also made me realize it was time to decorate my desk area too so I made this crochet Christmas tree with buttons!

Crochet Christmas Tree with Buttons!
This tree takes approx. 45 mins to an hour to make, depending on how many buttons you choose to add and, of course, your crochet and sewing speed.
I’ve done my best to write this pattern free of errors but as with anything handmade by a human, mistakes do happen. If you find any errors, typos, missing steps just send me an email at patricia@popsdemilk.com
Materials
Worsted weight (4) yarn such as Bernat Super Value in Kelly Green
4.00mm crochet hook
yarn needle
polyfil stuffing
assorted buttons
needle and thread to sew the buttons
(optional) plastic or cardboard for base cut-out
Pattern notes:
This pattern is worked from top to base in continuous rounds (do not join or turn at the end of each round).
Use a stitch marker to keep track of beginning/end of each round.
Instructions in brackets [ ] are completed the number of times indicated outside the brackets. For example, [inc in next st, sc in next st] x 5, means you would complete the instructions inside the brackets a total of 5 times.
Although it’s tempting to want to overstuff your tree like other plushies, it’s recommended that you leave some room at the base so the tree sits flat. Optionally, you can insert a cardboard or plastic cut-out (like the lid of a yogurt container or the cardboard from a cereal box) to keep the bottom flat.
You also have the option to fasten off at Round 23 and leave the tree hollow instead of stuffing it.
There are many variations you can make with this crochet Christmas tree pattern. You can use a different color for the tree, use beads instead of buttons, maybe add a string of tiny lights! One reader who made this pattern added tie strings to the sides and used it as a cute hat for their cat 😂 Experiment and see what you come up with!
Stitches used (US terms):
st(s) – stitch(es)
ch – chain
sc – single crochet
inc – increase (2 sts in same st)
dec – decrease (sc2tog/2 sts together)
BLO – work in back loop only
The Pattern
Round 1: make 5 sc in magic ring (5 sts)
Round 2: sc in each st around (5 sts)
Round 3: inc in each st (10 sts)
Rounds 4-5: sc in each st around (10 sts)
Round 6: complete the following [inc in next st, sc in next st] x 5 (15 sts)
Rounds 7-8: sc in each st around (15 sts)
Round 9: complete the following [inc in next st, sc in next 2 sts] x 5 (20 sts)
Rounds 10-11: sc in each st around (20 sts)
Round 12: complete the following [inc in next st, sc in next 3 sts] x 5 (25 sts)
Rounds 13-14: sc in each st around (25 sts)
Round 15: complete the following [inc in next st, sc in next 4 sts] x 5 (30 sts)
Rounds 16-17: sc in each st around (30sts)
Round 18: complete the following [inc in next st, sc in next 5 sts] x 5 (35 sts)
Rounds 19-20: sc in each st around (35 sts)
Round 21: complete the following [inc in next st, sc in next 6 sts] x 5 (40 sts)
Rounds 22-23: sc in each st around (40 sts)
Sew buttons to tree. Add stuffing (but not too much!)
The next round is worked in the back loops and will begin to close the base of the tree. At this point, you can trace the bottom of the tree on a piece of cardboard or plastic and cut out the circle. Insert the cut-out into the base of the tree after completing the next two rounds so the cut-out stays in place as you continue to close the base.
Round 24: Working in BLO complete the following [dec, sc in next 6 sts] x 5 (35 sts)
The remaining rounds are worked in both loops.
Round 25: complete the following [dec, sc in next 5 sts] x 5 (30 sts)
Round 26: complete the following [dec, sc in next 4 sts]x 5 (25 sts)
Round 27: complete the following [dec, sc in next 3 sts] x 5 (20 sts)
Round 28: complete the following [dec, sc in next 2 sts] x 5 (15 sts)
Round 29: complete the following [dec, sc in next st] x 5 (10 sts)
Round 30: dec in next 10 sts (5 sts)

Rounds 1 to 3

rounds 4 to 7

rounds 8 to 11

rounds 12 to 14

rounds 15 to 17
rounds 18 to 20

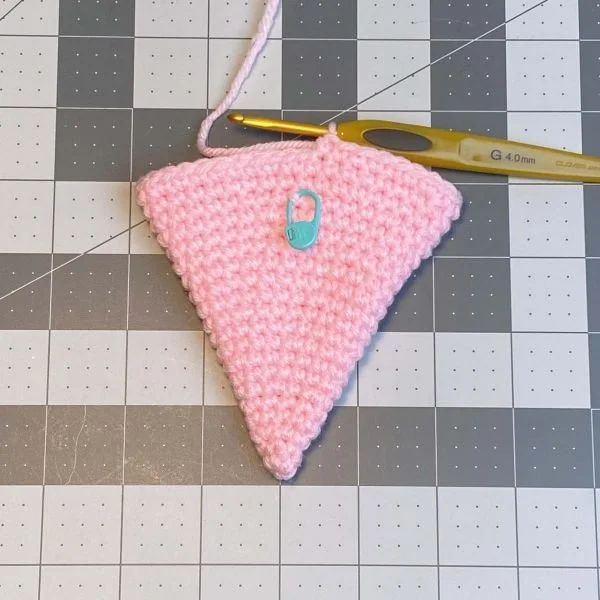
Sewing beads on the tree
If you’re not using a cardboard or plastic cut-out, use a yarn needle to pull the tail end through the center base and up toward the top of the tree. Secure yarn tail in place and weave in ends. Pulling the yarn through the center bottom to the top will create an indent in the base to help keep it flat on your desk.


Fasten off and use a yarn needle to weave in ends.


Chunky Christmas Tree Variation
Materials
Super Bulky yarn, such as Hobbii Honey Bunny
7.00mm crochet hook
Use the same instructions as above and decorate with buttons or a garland. I have a full tutorial on my YouTube channel!


Now go and display your crochet Christmas tree for your friends/co-workers/family to admire!
If you make this crochet Christmas tree pattern I'd love to see you creation, just tag me on Instagram @popsdemilk_crochet and use the hashtag #popsdemilk
Looking for more holiday related crochet projects? Then you might like these:
**********
This pattern is for personal use only. The pattern and its photos may not be reproduced, distributed or resold, translated, published, altered, shared or posted in any way over the internet or offline.
You may sell finished items made from this pattern as long as it is handmade by you, not mass produced, giving the credit to Pops de Milk / Patricia Castillo as the designer. If you have any questions, you can email me at patricia@popsdemilk.com